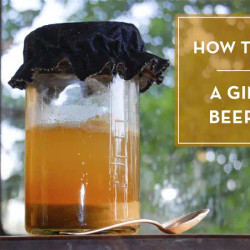
Day 1. Place 3 raisins in a clean glass jar and add 2 teaspoons of sugar and 2 cups (600 mls / 21 fl oz.) of cold water. Keep a cloth lid on the jar secured with a rubber band and sit it on the bench.
Day 2. Add 2 teaspoons of sugar and 2 teaspoons of ground ginger. Give it a stir.
Day 3. Add 2 teaspoons of sugar. Give it a stir.
Day 4. Add 2 teaspoons of sugar and 2 teaspoons of ground ginger. Give it a stir.
Day 5. Add 2 teaspoons of sugar. Give it a stir.
Day 6. Add 2 teaspoons of sugar and 2 teaspoons of ground ginger. Give it a stir.
Day 7. Add 2 teaspoons of sugar. Give it a stir.
Day 8. Drain off the liquid from the jar and keep the sediment. Throw away the liquid - it is not active enough to brew with yet.
Day 9 - Day 14. Repeat Day 2 - 7
Day 15. You now have an active bug and you can bottle your first batch. Drain of the liquid and don't throw it away this time. See below for instructions on how to bottle it.
Day 1. After you've strained off your ginger liquid for bottling, remove half the sediment from your jar. If you don't do this, it builds up and you have no room for your liquid. You can start another jar with this sediment or compost it.Add 2 teaspoons of sugar and 2 cups (600 mls / 21 fl oz.) of cold water to your glass jar and remaining sediment. No need to add more raisins now your bug is active.
Day 2 - 7 - Follow the Day 2 - 7 instructions above. No need to stir it now.
Add 2 cups of sugar to a large clean pot that will hold 4 litres (4 quarts) of liquid.
Add 2 cups of boiling water and stir till sugar is dissolved.
Add 12 cups of cold water (3.4 ltrs - 3.6 qts) and stir.
Add the strained juice of 2 lemons and stir.
Add the ginger beer liquid reserved from the bug on Day 8 and stir.
Wash three 1.5 ltr (1.5 qt) soft drink bottles and lids in really hot water and put 3 raisins in each bottle.
Fill each bottle, leaving 3 - 5 cm (1-2") gap at the top. Don't worry if you've got a bit more room in the last bottle, it will still work. Screw the lids on and put in a warm place for a week.
Give the bottles a squeeze after a week. If they're hard it means your ginger beer is fermenting. Put them in the fridge to stop any more pressure building up and drink them.
RECIPE NOTE
+The first couple of batches might not be super fizzy as your bug builds up strength. Keep brewing.
+No need to wash your jar each week, just remove some sediment so it doesn't build up and add fresh water
+Always make sure all your utensils are super clean so you don't introduce any unwanted bacteria into the jar. This is one of the reasons we don't stir it once its established.
+If you want to take a break from brewing ginger beer, put a storage lid on your ginger beer plant and put it in the fridge.
+Bottled ginger beer will last in the fridge for at least a month. The lemon juice is a good preservative.
+If you want to brew a lower calorie ginger beer you can reduce the sugar when you bottle it. You may not get as much fizz.
Wellness Mama recipe with Molasses-
Ingredients
8 cups filtered water
1-2 inch piece of fresh ginger root minced
½ cup organic sugar or rapadura sugar. If using plain sugar add 1 TBSP molasses for flavor and minerals
½ tsp sea salt or Himalayan salt
½ cup fresh lemon or lime juice
½ cup homemade ginger bug or ¼ cup whey for a faster recipe though the flavor won’t be quite as good. Here is a tutorial for how to make whey
Instructions
Make a “wort” for your ginger ale by placing 3 cups of the water, minced ginger root, sugar, molasses if needed, and salt in a saucepan and bringing to a boil.
Simmer the mixture for about five minutes until sugar is dissolved and mixture starts to smell like ginger.
Remove from heat and add additional water. This should cool it but if not, allow it to cool to room temperature before moving to the next step.
Add fresh lemon or lime juice and ginger bug or whey.
Transfer to a 2 quart glass mason jar with an air-tight lid. Stir well and put lid on.
Leave on the counter for 2-3 days until carbonated. Watch this step carefully. Using whey will cause it to ferment more quickly. It should be bubble and should “hiss” like a soda when the lid is removed. This is very temperature dependent and the mixture may need to be burped or stirred during this fermentation time on the counter.
Transfer to refrigerator where it will last indefinitely.
Strain before drinking.
Enjoy!
